lidbeckbrent

lidbeckbrent

Showing posts with label Easter. Show all posts

Tuesday, March 19, 2013

Watercolor Easter Eggs: Using A Paintbrush Techinique

Watercolor Easter Eggs: 
Using A Paintbrush Technique

Find your Inner Artist- Artful eggs

 If you're like me, always on the lookout for a new Easter-egg decorating technique, you will enoy the creative freedom you'll get from this technique:

Using a paint brush and watercolors, brush the color over the egg with a few simple brush storkes and then let the color do its own thing. The color will run, bleed and fade while drying.  That's what watecolors do.

Experiment while you create. Be artistic!

Photo credit: Michael Partenio

I developed this egg decorating project for Good Housekeeping magazine last Spring 
while working on concepts for our Easter photo-shoot. Brushstrokes of a variety 
of color mixed with water envoke a pretty pastel appearence.

Materials:
Tubes of water color paint in red, orange and yellow
3 bowls of water
3 small soft, pointed round brushes
White hardboiled eggs dyed in soft colors of pastel pink and yellow
Egg carton for drying eggs

In each bowl, mix approximately 1/2 inch blob of pigment with 
1/2 cup of water while disolving all of the pigment.


Using one color at a time, simply brush the color over and around the egg with one simple stroke. Then add another brushstroke of your next color, in another direction, until you have added 3, 4 or 5 storkes. The colors will bleed and run into each another while fading.  Place the egg into the carton to dry.

A large amount of eggs makes the most impact!

 Your studio might not look as chaotic as mine (above) but, experimenting is part of the creative process. Should you not like your design as you develop your technique, you can 
wash off the egg before it dries completely. Then wipe with a paper towel and start again.


For more Easter decorating ideas, grab a copy of Good Housekeeping April 2013 on the stands! 


Thursday, March 14, 2013

Kids Crafts- Make a Marshmallow Bunny

When my kids were young I designed many holiday craft projects for Parents magazine.  As a Mom, I  loved designing children's projects, since it involved my children. They were always willing guinea pigs!

Favorite projects were often ones that involved food, like this marshmallow bunny. If your children are old enough to pierce candies with toothpicks, this is a fun project to make with them.
Marshmellow Bunny 
Gather:
Large Marshmallows
Small pastel colored marshmallows
Smallest size cupcake  or muffin paper


Fruit by the foot, unroll and cut with small scissors to make buttons and boys bow tie
Small cookie and cake decorations can be used as decorations too!

Toothpicks

Use small tubes of white cake icing  to adhere candy dots like glue!

Assemble body parts with toothpicks (the toothpicks push through the paper, too!)

Have bowls on hand with a variety of other candies like gumdrops and jelly beans. Kids are great at coming up with all kinds of ingenious creations.

Enjoy the fun!

Thursday, April 12, 2012

Daffodils - The Wee Tree!

While daffodils are blooming,  you might consider making this.
I came up with this simple arrangement for a Good Housekeeping Spring Issue. With just a few materials in hand you can be put this together quickly.


1 dozen Daffodils  about 12" of a pretty ribbon ribbon,  a rubber band, floral foam and moss.

wee tree

Tightly gather a bunch of daffodils and secure with rubber bands. Cut floral foam to fit inside small container and soak in water; insert stems. Cover foam with moss and wrap with bright ribbon.

Monday, April 2, 2012

Start planning - My Easter holiday Inspirations

Take a peek!

The Good Housekeeping April 2012 issue is on the newsstands now with my inspirations designed for your upcoming Easter Holiday celebration.


Designing this year's Easter feature started a year ago with multiple design ideas, sketches and crafting. After weeks of prepping, propping and presentations with the GH editorial staff, the strongest ideas were pulled together.

Creating the final projects and preparing the many details for the photo shoot is all consuming.  For me, the real reward comes in the final stages where the photography and styling bring the projects to life.

Photography by Michael Partenio

Three-tiered Easter Basket Centerpiece

Adorn your Easter basket with coffee filters flowers


Easy paper cutouts using white and brown paper and a glue stick

Full details on how to make these easy DIY Easter projects are featured in 
April 2012 Good Housekeeping magazine in stores and libraries now! 
Have fun! 

Thursday, March 29, 2012

Crafty Flowers: Easter Eggs decorating- DIY

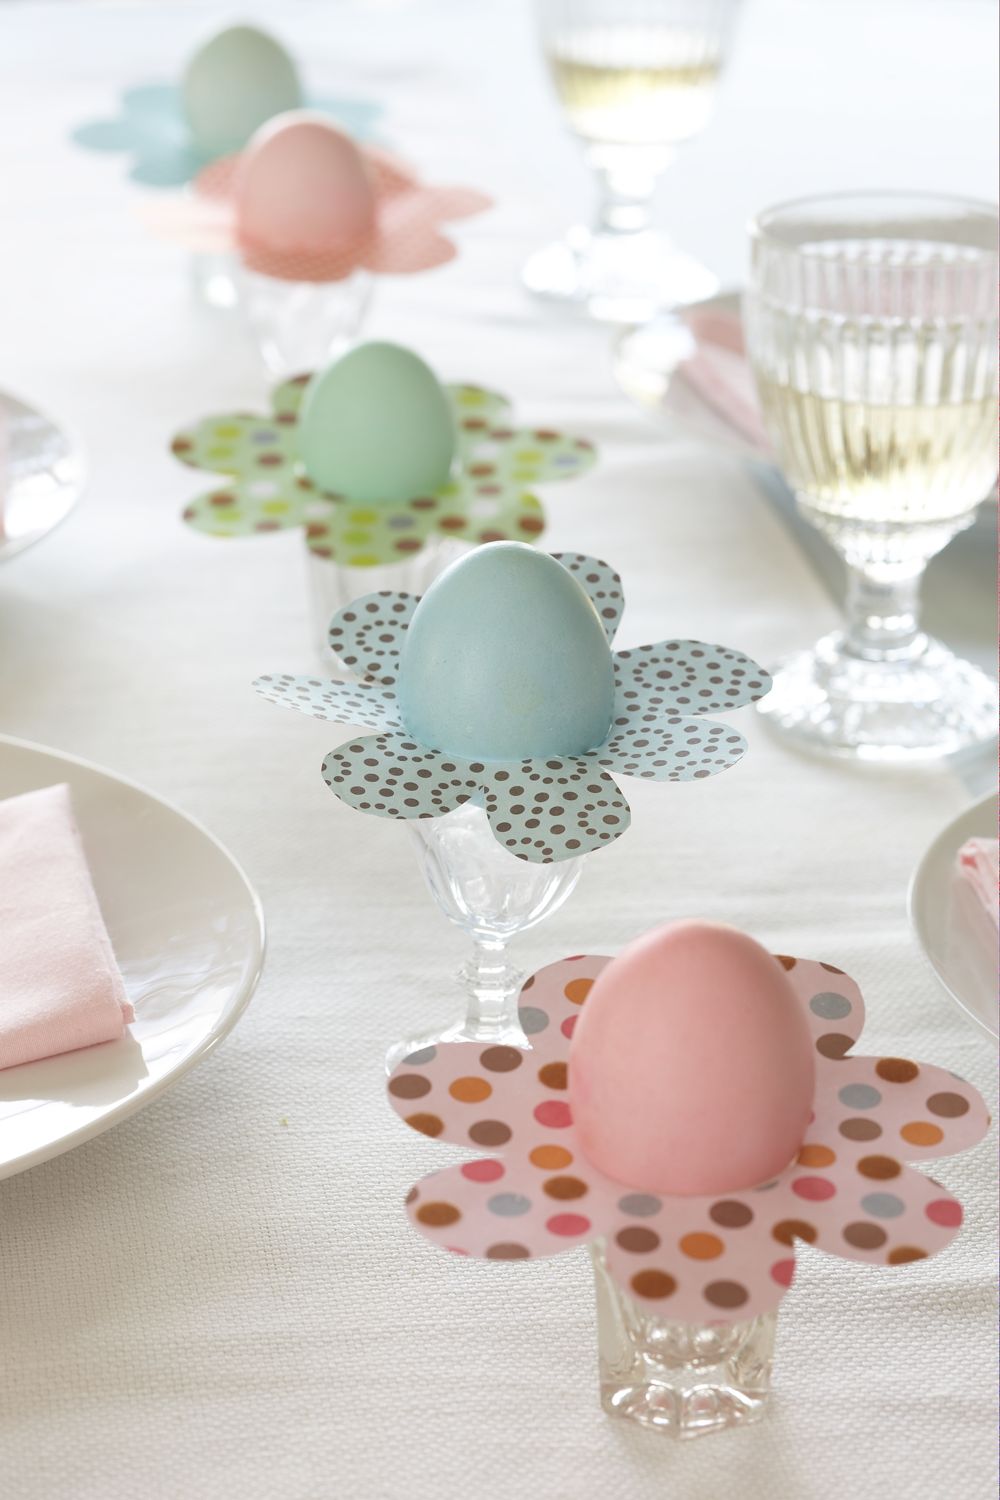
Wondering what to do with those those darling dyed eggs your family made in all colors of the rainbow? We tend to go overboard with egg dying in my house, so I came up with this crafty paper solution for displaying some of the favorites. Great project to create with your kids.

Photo by Michael Partenio
Designed by Karin Lidbeck for Good Housekeeping magazine Spring 2009

Cut out paper floral patterns to slip under the eggs and scatter them down the dining table,

Its so simple!

Choose fun patterned scrapbook papers from the craft and art store, use the patterns below or make your own floral shapes.

Center hole should be approximently 1 3/4" depending on egg size.

Sit the eggs in egg cups or small glass voltive holders,  and slip paper flowers under the eggs


Monday, March 19, 2012

DIY Easter Wreath - Made with Eggs! Yes, Eggs!

This EGG stravagant wreath was a creation of my brainstorming ideas for the 2008 Good Housekeeping magazine Easter feature.


I designed this wreath using  1/3 white, 1/3  brown and 1/3 white eggs sprayed a soft pink with Krylon spray paint.

All hollow eggs. Instead of blowing the eggs which is tedious work, break a small hole in the back of each egg and shake out the insides. The back of the eggs don't show.

Using a glue gun, glue 1/8" and 1/4" ribbons on some of the eggs. Glue all of the eggs to a straw wreath

The project takes some time to make.

Store the wreath in a plastic storage box and it will last for years to come.

You can use artificial eggs: Purchase here.