lidbeckbrent

lidbeckbrent

Showing posts with label eggs. Show all posts

Tuesday, April 3, 2012

Simple and Easy How tos on Decorating Eggs

For the past 15 years working as a contributing crafts editor to Good Housekeeping magazine, I have created dozens of DIY Easter projects.   The quest to find new ways to decorate eggs is always a fun challenge!

With Easter around just around the corner,  I'd love to share three of my favorite egg projects.


Simple dyed eggs: The fun is in the embellishments.

To create the eggs above:
Shop for pretty trims, and ribbons at your local fabric and craft store.  Some trims can be cut apart to make individual flower heads. Choose trims that are narrow and in scale with the eggs.

Dye a batch of hard-boiled eggs in your favorite color palette.  

Once the egg shells are thoroughly dry, glue pretty trims onto your eggs. One simple trim around the center of the egg is a simple and pretty embellishment.


Découpage Eggs

Working as a contributing crafts' editor for Woman's Day magazine in the 1980's,  I learned this trick: Découpage eggs with cocktail napkins!

An easy project. Here is the How-to in découpage eggs!

Hard boil white eggs. Peel the paper layers of cocktail napkin  apart. Use the thin printed outside layer.

Cut  the paper into small strips to cover the egg. Using white glue - slightly watered down, brush the  glue over a section of the egg, place the paper over the glued area. Brush more glue over the paper smoothing out wrinkles and adhering well. Add more glue and more paper to cover the egg. Do one side at a time, allowing to dry in between.
.
 
Paper Embellishments

Hardboil your eggs, Leave some eggs natural brown and white.  Dye some eggs in pale shades of pink and blue. Use of brown paper and twine inspired this Easter egg project. A simple how-to!

The  brown and white dots are made with a paper punch.   The flower petals and bunny figure are cut from brown paper using small nail scissors.  Apply paper shapes with a glue stick.

Add eggs wrapped with thin twine.


Speckled Eggs

Ahh,  then there is the speckled decorated egg! The look almost as true as eggs found in a bird's nest.

Easy DIY Easter egg decoration!

Dye the eggs using soft pastel colors - Just a few minutes in the bath. Allow to dry.

Be sure to cover yourself and working surface.

Using a watered down sepai brown acrylic paint, take an old toothbrush and run your finger along the brush to splatter the paint.

Place in a terra cotta dish with a ring of wheat grass around the edge of dish.

Monday, April 2, 2012

Start planning - My Easter holiday Inspirations

Take a peek!

The Good Housekeeping April 2012 issue is on the newsstands now with my inspirations designed for your upcoming Easter Holiday celebration.


Designing this year's Easter feature started a year ago with multiple design ideas, sketches and crafting. After weeks of prepping, propping and presentations with the GH editorial staff, the strongest ideas were pulled together.

Creating the final projects and preparing the many details for the photo shoot is all consuming.  For me, the real reward comes in the final stages where the photography and styling bring the projects to life.

Photography by Michael Partenio

Three-tiered Easter Basket Centerpiece

Adorn your Easter basket with coffee filters flowers


Easy paper cutouts using white and brown paper and a glue stick

Full details on how to make these easy DIY Easter projects are featured in 
April 2012 Good Housekeeping magazine in stores and libraries now! 
Have fun! 

Thursday, March 29, 2012

Crafty Flowers: Easter Eggs decorating- DIY

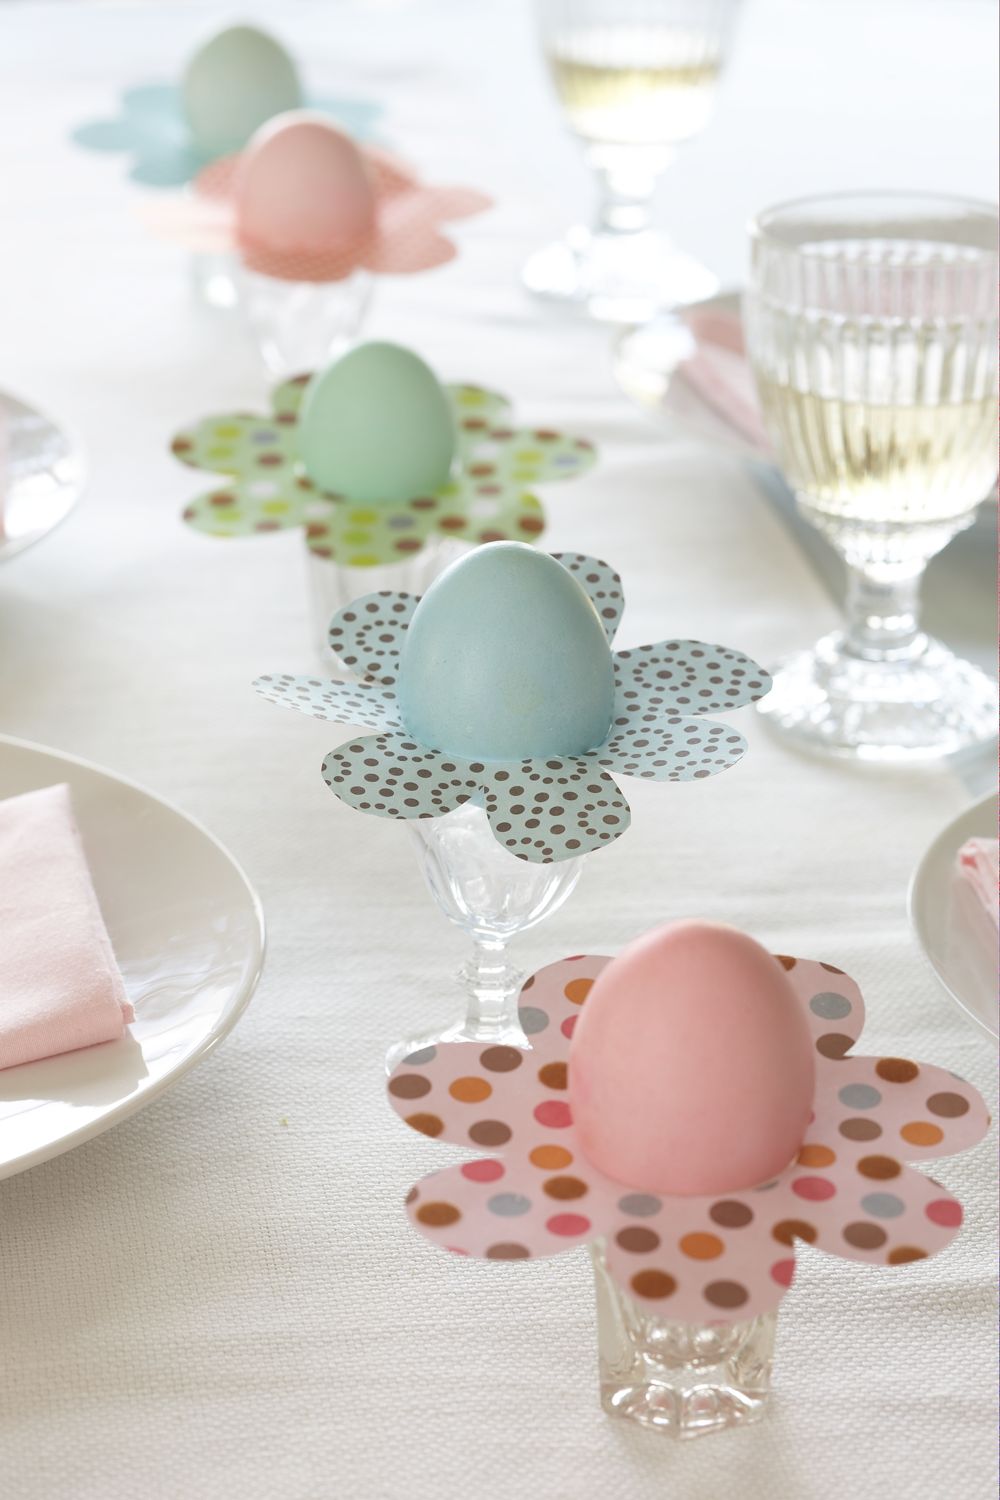
Wondering what to do with those those darling dyed eggs your family made in all colors of the rainbow? We tend to go overboard with egg dying in my house, so I came up with this crafty paper solution for displaying some of the favorites. Great project to create with your kids.

Photo by Michael Partenio
Designed by Karin Lidbeck for Good Housekeeping magazine Spring 2009

Cut out paper floral patterns to slip under the eggs and scatter them down the dining table,

Its so simple!

Choose fun patterned scrapbook papers from the craft and art store, use the patterns below or make your own floral shapes.

Center hole should be approximently 1 3/4" depending on egg size.

Sit the eggs in egg cups or small glass voltive holders,  and slip paper flowers under the eggs


Monday, March 19, 2012

DIY Easter Wreath - Made with Eggs! Yes, Eggs!

This EGG stravagant wreath was a creation of my brainstorming ideas for the 2008 Good Housekeeping magazine Easter feature.


I designed this wreath using  1/3 white, 1/3  brown and 1/3 white eggs sprayed a soft pink with Krylon spray paint.

All hollow eggs. Instead of blowing the eggs which is tedious work, break a small hole in the back of each egg and shake out the insides. The back of the eggs don't show.

Using a glue gun, glue 1/8" and 1/4" ribbons on some of the eggs. Glue all of the eggs to a straw wreath

The project takes some time to make.

Store the wreath in a plastic storage box and it will last for years to come.

You can use artificial eggs: Purchase here.